Categories
Seed saving and breeding

Rudbeckias ate my garden

Sun in Leo brings riots of rudbeckias

Believe it or not there was a time when I held rudbeckias in contempt. I mean, yellow is such a difficult color to combine with other flower colors, and you know, black-eyed susans grow everywhere anyway. Ubiquitous. Boring.

Long ago I began my gardening career with the attitude that non-edible ornamentals were indulgent frou-frou. I still definitely give priority to stuff we can eat and otherwise consume, however my stance has softened over time. I really do love flowers.

Anyway, about 20 years ago in a major act of feng-shui, we moved the driveway from the front of the house to the back, and needed to make the old driveway area quickly look like it was not a driveway. A bit of cedar fence, and a very large rock we dug up nearby helped, but some lush greenery was needed. Trouble was, where the old driveway had been, the soil was super compacted, poor to the point of being almost non-existent, and dry, dry, dry.

What Indian Summer
looks like

I had stumbled upon Indian Summer rudbeckias in some seed catalog the prior winter. In spite of my prejudice against yellow flowers, I bought a packet and started a couple of plants in the spring. Their vigor was amazing, as was the size of their flowers, and they created an instant-but-lasting vibrant display of solar yellow and greenery. Driveway? What driveway?

Rudbeckia hirta’s USDA plant profile lists it as annual, biennial and/or perennial, which tells you something about its vigor, diversity and adaptability. They can set seed in one season and over-winter, but as for the perennial part, in our gardens they are short-lived – they mostly behave like annuals and biennials. Still, I’ve never had to resow any – all I do is yank them out when they pop up in inconvenient places, which they do. Yes, you could call them weeds.

What ancestor Cherokee
looks like.

Indian Summer impressed me sufficiently to let them self-seed, which they did with abandon. I even began to consider other rudbeckia varieties, and after a few years introduced a couple of plants each of Cherokee and Chim Chim Cheree into the naturalized population of Indian Summer.

On their own, Cherokee and Chim Chim Cheree didn’t click with me the way Indian Summer did. Cherokee is a smaller plant, with very double and smaller blooms, and a lot of darker orange and reddish brown. It hit me as a bit too poufy-looking. Chim Chim Cheree is also smaller, with a lot of darker colors, and has very unusual rolled petals that look like quills, so it resembles a chimney brush. The flower had a spiky, kind of sparse appearance that, in my opinion, didn’t come off very well in the garden because the plants were not all that vigorous to begin with. But each of these varieties added some genetic spice to the rubbeckia pot.

Above, slightly quilled petals from
ancestor Chim Chim Cheree.

Over the years the added genetics have done magic, adding subtle and not so subtle variations to the dominant stock, Indian Summer. I especially like a bit of brown-orange at the base of the petals, as if they had been just lightly air-brushed. As a cut flower, they’re superb – nice strong stems and they last for days in the vase.


I occasionally mark outstanding plants to make sure to leave them to go to seed, and intentionally rogue out anything that looks less than lovely and vigorous (there are not many). Other than that, they take care of themselves very well… maybe too well. They are one of the most fire-tolerant plants I’ve ever worked with.

Why, you may wonder, would I care about this? It’s actually a benefit because our gardens consist of permanent raised beds that are never tilled, with perimeters and paths between beds maintained by flame-weeding. The rudbeckias can manage a good living for themselves in the corners and edges of beds, where most plants would succumb to the torch passing by.

Categories
Heirloom plants Seed Savers Exchange Seed saving and breeding

Conti’s Marconi Rampicante Romano Bean

The name is musical and surely doesn’t sound like a Vermont heirloom bean, but indeed it is, with a history approaching 100 years of being grown in Barre. It just goes to show that there really was some cultural diversity in Vermont in the 20th century, even though, at least when I was growing up, cultural diversity was not much discussed or encouraged.

pods of conti's marconi bean

I received this seed from Alan LePage, a market gardener in Barre, who received it from one of his neighbors, Constantino “Stan” Conti. Stan’s parents brought the seed with them to Barre sometime between 1914 and the mid 1920s when they emigrated from the stone-quarrying village of Lettommanoppello, in eastern central Italy, to live in the granite-quarrying town of Barre, central Vermont.

“Rampicante” is Italian for “climbing” and this is a rampantly climbing pole bean for sure. I’ve had some jump their 10 foot poles and climb into an apple tree. This vigor extends to their pod production as well – the flat Romano pods average 10 inches long at maturity, and if kept picked it will keep bearing until the frosts come. But, what is amazing about this bean is the superb flavor and crisp texture, even when the pods reach 10 inches and more. I can understand why the Contis brought the seed with them and continued to grow it in Barre all those years.

 x

Conti’s Marconi Romano behind some “wild” (non-bulbing) perennial fennel.

The “Marconi” part of this bean’s name was probably given as a tribute to Guglielmo Marconi, an inventor known as the “father of radio.” He was evidently widely celebrated in Italy with many streets in towns and cities all over the country named after him. There is a Marconi sweet pepper, and a quick internet search reveals Supermarconi Romano pole beans, Supernano Marconi Gold, White-Seeded Marconi Romano bush beans, and Black-Seeded Marconi Romano bush beans being offered by seed vendors. If anyone knows anything for sure about the history of "Marconi" beans in Italy, I’d love to hear about it.

I find it interesting that there are no Romano beans, or anything resembling them, listed in The Beans of New York. Published in 1931, Beans of NY was part of a WPA project to catalog vegetable varieties known in the Northeastern US at the time, and it’s pretty thorough. I’m sure there were many other folks besides the Conti family who brought Romano-type bean seed with them from Italy when they came to the US in the early 20th century, but evidently these beans were not well known outside the Italian-American community.

 x x

Romano beans as a category are snap beans, stringless, with flat, wide succulent pods. They are great examples of the plant breeding proficiency of Italian gardeners and farmers. Consider that many vegetables now considered quintessentially Italian – tomatoes, beans (Phaseolus vulgaris), peppers, and corn – had their origins in the New World and were unknown in Italy until the 16th century

 x

The seeds

While its culinary aspects are excellent, for a bean, Conti’s is a bit of a nuisance to get seeds from. What makes it so tasty – the pods’ ability to stay tender and crisp – means that the pods are not inclined to dry down well and protect the seeds from mold at the end of the season. Plus, the seeds are thin-skinned and prone to splitting open in the drying process. Our autumns tend to be cool and damp, so the pods with mature seeds have to be brought inside and dried with gentle applied heat. I hang them in net bags near our wood furnace, and turn them daily. The extra attention is well worth it. This is one of the finest tasting green beans you’ll ever come across.

Categories
Seed Savers Exchange Seed saving and breeding Variety portrait

Two Remarkable Tomatoes

Dan and Val McMurray, or Grunt and Grungy as they were known on the Homegrown Goodness Forum, were fellow extreme gardeners in British Columbia. Their presence is sorely missed, but many of us were gifted with seed and good gardening advice from them, and they live on in our gardens and memories.

Tomatoes were a particular passion with them. When I realized the extent of their tomato endeavours (I believe they grew hundreds of varieties) I had two questions to ask: Of all the varieties you have grown, which are the best tasting early tomatoes, and which are the longest keeping tomatoes?

Burztyn

I promptly received seed for several varieties of each category in the mail. In trialing them, two real stars emerged that adapted well to our climate and have become “must-grow-every-year” tomatoes for us.

Burztyn was aquired by Dan and Val in 2004 in a trade with someone named Jetta in Denmark. There may be another variety in the Seed Savers Exchange that goes by the same name, but is indeterminate. Our Burztyn is determinate. To add to the confusion, the word “burztyn” means amber-colored in Polish, and there are a few varieties floating around from eastern Europe and the former USSR called Amber or Amber-Colored. I may have to try to get a few seeds of the SSE’s accession to grow out to see if they are the same variety.

Burztyn a few weeks after picking

Here’s Dan and Val’s description: “60 – 70 days, det., regular leaf, blemish free amber colored fruit, 2-4 oz. Very good tomato taste, more sweet than acid. A must regrow here. 9 lbs/plant.”

We found it to be nicely early, and the flavor is such that when it’s ripe there is a tendency to ignore other ripe tomatoes. Burztyn seems to have a certain amount of disease resistance – it can stand up to late blight a little longer than some, though it’s certainly not immune. It also keeps a month or so after picking, which is very handy in our climate where frosts can strike any time after September. Burztyn can be purchased at Tatiana’s Tomato Base

Giraffe Abricot has very tall vines

The second tomato is not a luscious tomato by any stretch of the imagination, but no other tomato I know of stores as well. It’s called Giraffe Abricot (or just Giraffe), giraffe because the plants are very tall and elongated (it requires about 6 feet of vertical support), and abricot because of the apricot color (yellow blushing orange) of the ripe fruits. I don’t know exactly who Dan and Val got it from, but it is a Russian commercial variety bred at the VI Edelstein Vegetable Experimental Station.

Giraffe Abricot picked in early September
for winter storage.

Here’s more about storage tomatoes.

Now, as I write this at the end of January 2013, I still have 3 Giraffe Abricots left that were picked in September of 2011. I wouldn’t seriously plan on keeping them into a second winter as part of our food scheme, but I am amazed by their shelf longevity. Nothing was done except to pick them carefully into a flat lined with newspaper (as seen in the photo above), and put the flat on a shelf in our cold room. In all honesty, after 16 months in storage, they are not really palatable – at this point they completely lack acidity and they are rather pallid. You can see the color difference in the two photos.

Giraffe Abricot in first winter of storage.

Through the first winter, they do have enough flavor to make a positive contribution to such culinary endeavors as omelettes, sandwiches, quiches, etc., if they are thinly sliced, but forget about salads, sauces or salsa.

This tomato is about storage, not flavor. It has better disease resistance than the other long-term storage tomatoes I’ve grown. Those others have better flavor, but when it comes right down to it, the better flavor doesn’t do me any good if they are going to promptly rot out. We’ve been dealing with late blight for the past few years, and I’ve found that for Giraffe, if I pick the fruit at the first signs of LB on the plant’s foliage, the fruits escape infection. That’s how it was when I harvested this batch in September 2011. I was not paying close enough attention this past fall, and the blight got into the fruits, so I lost the entire crop.

Giraffe Abricot in second winter of storage.

So, of course it has occurred to me that maybe a cross of these two gifts from Dan and Val would result in an improved storage tomato. I think I’ll have to try it this coming season. A Burstin’ Giraffe perhaps?

Categories
Cultivation techniques Heirloom plants Seed Savers Exchange Seed saving and breeding Variety portrait

Passumpsic Jerusalem artichokes

Passumpsic blooming

I brake for Jerusalem artichokes (and you should, too).

I don’t recommend car window botanizing for drivers, but it’s a fine sport for passengers, and can yield treasure. That’s what I was up to in the early 1980s when one day, on RT 5 as we passed a local burger and fries place, I spotted a small patch of Jerusalem artichokes just off the edge of the big gravel parking lot. I later returned under cover of darkness with folding shovel and bucket to pilfer a few for planting.
I now have a big fine patch of them, which is a good thing because the burger joint parking lot became a used car dealership, totally paved over, and there’s nary a sunchoke to be seen on the banks of the Passumpsic River. RT 5 between St. Johnsbury and St. Johnsbury Center has been heavily strip developed.

Jerusalem artichokes

So, how did they get to the banks of the Passumpsic River? Jerusalem artichokes, helianthus tuberosus, are closely related to the common sunflower, and were originally domesticated by Native Americans in the Midwest of the USA, where they grow “wild”. The thing is, here in our short growing season, they barely have a chance to flower before hard frosts, so they never set seed. Thus, my conclusion is, any plants found in our area were originally planted from tubers by humans, especially as far up in the watershed as we are.

The odd name “Jerusalem artichoke” is a corruption of the Italian “girasol” which means “turns toward the sun.” Jerusalem artichokes were brought to Europe and appreciated there both as livestock fodder (pigs adore them) and as famine food. They saved many people in France from starvation during World War II.

However, the Europeans who came to this country had little respect for this plant. They much preferred potatoes. There was also a cultural issue, especially in our area, because this plant was associated with Native Americans. In living memory, even Abenaki descendents here would shun anything that might betray “indian-ness”, and for good reason. They were targets of a state eugenics program in the 1930s, which itself was a crescendo of strong racial prejudice that came with the English-dominated European settlement of northern Vermont.

I seriously doubt that the patch I found above St. J. was planted by anyone in the last hundred and fifty years or so. I believe it was a remnant of a Cowas (the local Abenaki band) river bank garden. I have named this variety Passumpsic after the river, whose name means “clear flowing water.”

The tubers of Passumpsic

The tubers of Passumpsic Jerusalem artichoke.

Passumpsic is a very good quality Jerusalem artichoke. It is long and smooth, and easy to clean, unlike the knobby types that are more common. My favorite culinary use for them is in kimchee – they are really delicious lacto-fermented: nice and crisp. They are perennial and can be left in place and dug up as needed whenever the ground is not frozen, and they’re at their best in the late fall and early spring. If given a good sunny position and decent soil, they will thrive. However, I do not allow them in the garden proper. They have their own area off to the side, with recyled metal roofing mulch between them and the garden beds. They are definitely invasive in a garden situation. They need to be managed ruthlessly once established if you want to continue to grow other plants as well, although I’ve heard that if you put pigs on them, the pigs will devour every last one.

Jerusalem artichokes in their own patch

Note the metal mulch. It’s too narrow and is being replaced with wider sheets to be more effective at keeping them in their place.

So, if you happen to be in any of Vermont or New Hampshire’s river valleys, keep an eye out for the tell-tale tall yellow fall flowers, or the clusters of tall dry grey stalks from the previous year’s growth. You just might be able to rescue a Native American heirloom plant.

Categories
Seed saving and breeding

Blushing cabbages

young cabbage plant

A very young cabbage plant in June

I think cabbages are beautiful. However, I was once showing someone around the garden, when I gushed, “Oh – over here! You’ve just got to see these GORGEOUS cabbages!” and I suddenly realized that there are some people in the world who don’t equate beauty with cabbages.

young cabbage plant

Anyway, I received some very special cabbage seed to trial this season from Ottawa Gardener of The Veggie Patch Reimagined. She crossed Mammoth Red Rock with San Michele (San Michele is one of my favorites – a large red-tinged savoy) and the result is a superb cabbage, seemingly a smack-in-the-middle blend of its two parents. It has more red/purple color than San Michele and the texture is more delicate than Mammoth Red Rock: the leaves are lightly savoyed (puckered). I really love the texture – very brittle, tender and crunchy – quite delicious raw.

bursting cabbage

After 7 inches of rain in one day

A couple of weeks ago Hurricane Irene dumped about 7 inches of rain on us in 24 hours. The earliest-set-out cabbage’s response was to burst open (I was not surprised), so I harvested it for a big batch of kimchee, and stuffing and salad. The head weighed over 6#, and was 9.5 inches across.

The harvested head

The harvested head

Cut up with some apples for kimchee

There is not much color or other variation among the 7 plants I am trialing so far – I find it interesting that they’re all quite uniform (and I must say consistently beautiful) in this first generation. Thanks Ottawa Gardener – really nice work!

Categories
Cultivation techniques Heirloom plants Seed saving and breeding

Bergeron Fava Bean

Here’s quite an unusual heirloom for northern New England – vica fava, also known as broad bean and horse bean. This is a different species than our more familiar snap and dry beans, phaseolus vulgaris, which have their origins here in the western hemisphere.

Bergeron fava blossoms

Favas are one of the oldest domesticated food plants, with origins in the Mediterranean region. They are quite widely grown and eaten elsewhere in the world, but are not very well known here.

I received this in the 1980s from Annette Bergeron, who, with her sister, left their family farm in Quebec to marry two brothers in West Burke, Vermont probably in the 1940s. Hence, I gave it her maiden name. She said in Quebec they called them “Monkey Beans” and in some years, when they could not afford to buy coffee, they would roast the favas and grind them up for a coffee substitute.

As an aside, I used to have a bean (phaseolus vulgaris – it was a bush dry bean) called Quebec Coffee (aka Canada Dot Eye), which makes me wonder if it was a common practice in Quebec to roast and grind various beans to make their hot beverages. If anyone knows anything about this, I’d love to hear about it.

Anyway, most likely these favas were brought over from France to Quebec.

It took me quite a while to get what they were all about. For years, I gave them prime real estate for phaseolus vulgaris – sunny, sandy well drained soil – and I was barely able to keep them alive. They would get totally covered with aphids, and have very few flowers, and hence very few beans. They were miserable, but I stubbornly kept them going, motivated by sentiment alone.

Bergeron fava blossoms

Finally, I got decent information about their cultivation (Thankyou Alan LePage – see “Radio Talk Show for Gardeners” at right). Favas, unlike phaseolus vulgaris beans, like cool and moist conditions (they are grown in the winter in the Mediterranean). This makes them quite valuable to me, because a large portion of my gardens are on the wet and clay-ey end of the spectrum. Heavy wet soil is no good for ants, so the aphid problem is nearly eliminated by growing favas in the wetter spots.

Bergeron fava blossoms

Here on the edge of zone 3 and 4, favas need to be sown absolutely as early as the ground can be worked so that they can set pods before summer’s heat (we sometimes do actually have hot weather in the summer, though sometimes not). I haven’t tried fall planting them yet, but that’s a possibility when I get to a point where I have plenty of seed to fool around with. Overwintering’s risky with our voracious mice and voles.

Bergeron is not a particulary early-maturing fava, and I can’t really say how it compares in other ways to other fava varieties. It’s the only fava I have any significant experience with. Favas self pollinate but are also insect pollinated, and very attractive to pollinators; so isolation is required to maintain the variety.

green shell stage

And so, what can you do with them, you may well be wondering. Check out Wikipedia and you’ll find all kinds of culinary suggestions. Favas are very delicious at the green shell stage braised, steamed or sauteed. I haven’t yet tried them as a substitute for chick peas in hummus, but that’s another way folks use them. As a dried bean, they have a tough skin, some varieties more so than others, so sometimes it is necessary to remove the skins before cooking or serving. I’ve used Bergeron either way – at the green shell stage the skin is usually tender enough to leave on.

Favas sprouts

I learned about sprouting the dried beans before cooking from an Egyptian garden blogger, and I really like them that way, braised with onion or garlic and simmered until tender. The skins come off the sprouted beans easily. In Egypt they are evidently widely eaten for breakfast.

Also, the young leaves are very good as braised greens, so I plant the favas thickly and harvest the thinnings, which are very welcome in early spring. Note the sticks in the photo below laid out to keep the vole patrol (2 cats) from digging up the newly planted bed…

Favas for greens

Categories
Cultivation techniques Seed saving and breeding Variety portrait

TPS Potatoes: Who’s Yer Daddy?

I previously posted about two potato varieties grown in 1994 from TPS (true potato seed) I collected from a potato called Blue Shetland (SSE 1184). I am fascinated by Shetland potatoes, which come from the Islands of Shetland, off the Scottish coast. They are colorful inside and out, and their rich flavor is superior as far as I’m concerned, though folks who are used to the usual insipid tasting commercial potato varieties might find the flavor “strong”. My Shetland spuds tend to be small, but the flavor makes up for the size. They also keep very well.

Hurley's Purple Gold potatoes

Hurley’s Purple Gold, the mother plant. It very closely resembles its mother, Blue Shetland.

One of my two Blue Shetland offsprings, Hurley’s Purple Gold, very closely resembles its parent, and I was fortunate enough to collect a viable seed ball from it in 1996. But, after my initial experience growing potatoes from TPS, I was a bit leary of the time and space required, at least the way I went about it the first time. However, last winter I was inspired to try it again by the videos of Tom Wagner’s TPS workshop at Bifurcated Carrots.

Tom has a genius growing method for TPS that speeds up the process, and requires very little space. I don’t have a greenhouse, so all my seedlings are started on windowsills, which makes me very picky about starting seedlings early. Initially, I was going to get some TPS from Tom but I came across the old seed from Hurley’s Purple Gold and decided to go with that.

seedlings from true potato seed

All the seeds went into a little 2″ pot; about 30 germinated; emergent seedlings were exposed to direct outdoor sunlight; and later the eight strongest seedlings were transplanted to a 4″ pot, buried up to their top leaves. The close planting keeps the seedlings leggy, which is desirable in this case. The idea is to have long stems, since the tubers form on buried stems.

This method is so cool – I could easily see and compare color variations in the seedlings very early on (I’m looking and selecting for strong color), and the individual seedlings’ vigor is also quite apparent when they are grown in such competitive conditions. You can rogue out weaklings early on, and not waste energy and space with them.

TPS seedlings in the garden bed

As you can see, I spaced them rather closely in the garden bed. In hindsight, I wish I had given them more room – after my first TPS growout many years ago, I was not expecting full sized plants in the first year. I heaped compost on the plants several times during the growing season, burying as much stem as possible. This is how the plants looked just before I cut them down.

Purple Gold potatoes

Late blight struck the gardens about the second week of September 2010, so I cut all the foliage off at ground level much sooner than I normally would have. It was somewhat tempting to leave them to see how much late blight resistance they had, but I have no more TPS from the Shetland potatoes (they rarely set seed) so I really didn’t want to risk losing them. When I cut them, there was no sign of late blight on them. All our other potatoes had had their normal end of season foliage die-back, but these were still going strong. I assume that’s because they were first year seedlings, and not because they’re all very late maturing.

Digging up the spuds

Here’s an overview of the harvest. For me, digging up seedling potatoes feels like being a young child on Christmas morning. The TPS I used was not hand pollinated, so I didn’t really know what to expect. I grew about 8 other non-Shetland potato varieties the year I got the seed ball. I was hoping for more Shetland-y spuds, with darker yellow flesh, bigger tubers and red and purple skins. Initially when I dug them up, I was a little disappointed not to get more strong yellow flesh. I couldn’t really see the flesh colors very well, because I didn’t have time to cut into them, do photos and maybe cook some up. I just knicked the skin of one each to get a rough idea, and tucked them away until I could evaluate them better.

So, finally, here’s what I got when I properly opened my presents, and I’m not disappointed any more.

Tuber portraits

#4 and Fenton

#4 left, Fenton (probable parent), right

One seedling (#4) was a monster, producing 5# of spuds, some of which weighed 10oz. We haven’t yet taste tested #4, but so far I am very impressed, and I like the really dark skin and flesh color. My guess is that the father was Fenton, an heirloom potato from Mercer ME I got from Will Bonsall via Seed Saver’s Exchange. Fenton’s one of those Congo, All-Blue, etc. blue/blue potatoes, and it’s a variety that we’ve kept over the years because it’s very rugged, productive, blooms profusely, and tastes really good – a nice baking potato. The other parental possibility would be Peruvian Purple, but I think it’s more likely Fenton.

#4 and Fenton

#5 right and parent Blossom, left

The other real stand-out was #5, which obviously was a cross with Blossom. Blossom was bred in Minnesota by Ewald Eliason with an eye for flowering, among other things, and is mentioned in Carol Deppe’s book Breed Your Own Vegetable Varieties. Blossom is a beautiful plant and has very good tasting all purpose pink fleshed potatoes. It’s also very rugged, another of our “old reliable” varieties. Blossom does bloom fairly strongly here, but I have never gotten a viable seed ball from it, whereas Fenton is a more reliable seed producer.

Anyway, #5 is REALLY tasty, and I like the strong red flesh color. The seedling made over 3# of tubers, a very respectable showing, I think. All in all, I’m pretty excited about this venture, though I think I will wait another year before I grow out more TPS, so that I can be sure to give the 2011 growout of 2010’s seedlings its due.

If you’re interested in Shetland potatoes and other TPS projects, Rebsie at Daughter of the Soil has a great post about the Shetland potatoes she’s working with.

Categories
Seed saving and breeding

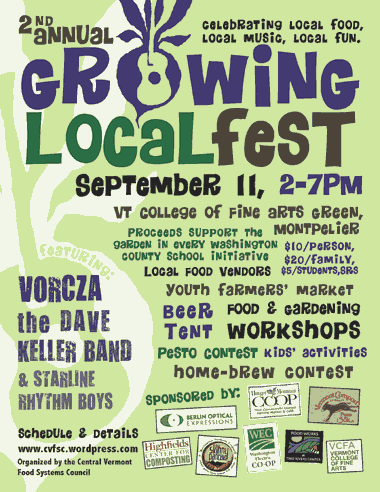
Seed-saving workshops at Growing Localfest

Growing Local Festival 2010, Montpelier VT
I will be giving 2 mini-workshops about seed saving, Vermont heirlooms and plant breeding this coming Saturday, September 11, 2010 in Montpelier, Vermont. The GLF is a fund-raiser for an excellent gardening-in-the-schools program in central Vermont.
One of the workshops will be a very basic how-to demo with a discussion of what “heirloom” varieties are. In the second, I’ll talk about my Shetland potato project and growing new potato varieties from true potato seed using Tom Wagner’s great techniques; and about “naturalizing” food plants in the garden (ie, getting plants you want to sow themselves). I’ll also be hanging out at my table to chat throughout the afternoon, so if you’re in the area, I hope to see you there!
More info about the Growing Localfest

Categories
Cultivation techniques Seed saving and breeding Variety portrait

My sugarloaf chicory greges*

*(from Wikipedia) The term grex (pl. greges), derived from the Latin noun grex, gregis meaning flock…
When a hybrid cross is made, all of the seedlings grown from the resulting seed pod are considered to be in the same grex. Any additional plants produced from the hybridization of the same two parental greges also belong to the grex. All of the members of a specific grex may be loosely thought of as “sister plants”, and just like the brothers and sisters of any family, may share many traits in common or look quite different from one another. This is due to the randomization of genes passed on to progeny during sexual reproduction.

chicory in the lawn

The sugarloaf chicories are absolutely my favorite green. I tried saving seed for them quite some time ago, in the 80s, and didn’t have great success at first – chicory seed is not easy to harvest and process. They are mostly biennial, so I thought at first that I needed to choose my seed parents in the first year and over winter them in the root cellar. However, one May as I was walking across the lawn, my eyes beheld a sight very like the photo above. Somehow a sugarloaf seed had managed to escape into the lawn, germinate, grow and survive the winter. I can take a hint, so I dug it up, gave it a proper place in a garden bed, and decided to pretty much just let it do its chicory thing with a few other stray sugarloafs I found in the garden proper. We have no wild chicories in the neighborhood, so I didn’t have to worry about isolation (they’re insect pollinated). And, I gave up trying to figure out the optimum sowing time (too early, it bolts; too late, not big enough). Now they just sow themselves. I weed them, toss them some compost, yank out whatever doesn’t please me… and eat them all.

The original one plant was probably from Greenlof (Sugarhat) which I got from William Dam Seeds, so it’s likely of Dutch origin. I soon added more varieties of this type of chicory including Cornet d’Anjou, Snowflake, Sugarloaf/Pain de Sucre and most recently Blanc de Milan, in three different parts of the gardens.

A chicory patch just after the snow has gone

Just after the winter snow had gone (early April 2010), a patch of naturalized sugarloaf chicories, 15 years on. The plants in this area are descended from the original plant I found in the lawn. You can see the remains of the seed stalks fom last year.

Only plants that survive the winter in the garden become seed parents. I sometimes give them a leaf mulch for winter, but this is tricky. It does allow harvesting the greens right out of the garden well into December, but it also attracts voles who will pull whole plants down into their underground lairs and eat them roots, leaves and all. I hate voles.

Second year plant surrounded by seedlings

Second year plant surrounded by seedlings.

I make selections for seed parents mainly in the late fall and early spring, just by roguing out (removing) any plants that don’t have the characteristics I’m looking for. At these times of the year the plants express their more subtle differences the best – in the summer when they are seedlings and when the second year plants begin to bolt, they more closely resemble each other. At first, making the choices was pretty easy, because there were a lot of hairy, limp leafed plants and I knew I wanted hairless, crisp leaves. Now there are very few hairy chicories showing up, but, what is fascinating to me is that even after all these years of selecting, if anything, there seems to be MORE diversity in the population. Check out the photo below – I have never had any radicchios or red chicories bolt here, yet in the last couple of years, I have color showing up more and more.

Diversity in the chicory population

Spring 2010 – the diversity in this group blows me away!

Bolting chicory

I have been favoring curling leaves and wavy edges. The result has been more plants like the seed parent in the photo at left which bolted last summer. It reminds me of a many-armed flamenco dancer.

I have also been watching out for anything that shows perennial tendencies, and letting it propagate. Color pleases me, too. As I walk into the chicory areas, I often feel like a guest at a huge banquet table, presented with more enticing possibilities than I can possibly pursue…

And speaking of banquets, you will never find salad greens better than these:

early April salad greens

Early April salad greens, straight from the garden. From top left, clockwise: hesperis, lovage, peppermint buds, sugarloaf chicory, and parsley.

Categories
Heirloom plants Seed Savers Exchange Seed saving and breeding Variety portrait

Littleton bean – one of our own Three Sisters

Littleton pole bean, dried

Here’s yet another horticultural bean from my neck of the woods. Thankfully, I have not heard or seen it referred to as a Cranberry bean. This is one I acquired in 1985 by participating in Seed Savers Exchange growers’ network. BN-17, as it is also known, was originally put into SSE by Ernest Dana of Etna, New Hampshire.

The name refers to Littleton NH. Plant breeders extraordinaire Elwin Meader and Albert Yeager referred to it as an “old New Hampshire heirloom” in Breeding New Vegetable Varieties (1957, NH Agriculture Experiment Station). They chose it to cross with their own Flash in a quest to breed a bush horticultural bean with bright red color, not only on the pods but also on the seeds at the green shell stage. They also wanted pods that would pop open easily. At that time, horticultural beans typically went to market in the pod when the seed was mature, but not dry, and the seed color at that stage is usually off white with only a hint of the streaking and color that becomes pronounced when the bean seeds are dry. The characteristics sought from Littleton were the large seed size, earliness and prolific production. From Littleton x Flash they created Shelleasy.

Littleton bean in bloom

Littleton is not a bush bean – it won’t stand up on its own; but, it’s not a typical pole bean either – the vines only grow to about 4′ long. Beans with this kind of plant architecture are sometimes referred to as twiners or half-runners. Like full sized pole beans, half runners have fallen out of favor. They’re not suited for mechanized harvest, and most home gardeners don’t want to be bothered with the extra work of providing support. But those whose make the extra effort discover that these types of bean give higher yields in a given amount of garden space than bush varieties.

I was always intrigued by the concept of the Three Sisters (corn, beans and squash) grown together in hills, with the beans climbing the cornstalks. I tried this several times with various pole bean varieties only to have the beans strangle and smother the corn. When I finally tried half-runners on the corn, it worked…

You may notice in the photo below, there is no corn. In the past few years we have had a severe raccoon problem, and I can’t chance growing these rare beans where they’re likely to get ripped and trampled.

The beans growing in a bed with squashBean pods at the green shell stage

Littleton growing on short poles in a bed with squash.

The same season I got Littleton through the SSE grower’s network, I also grew out another half-runner, Mohawk Horticultural, SSE BN-220. Very little information came with either Littleton or Mohawk. For Mohawk it was simply “80-105 days, Indian, 1825 ” and that the original source was ME/HO/L (ME = Maine). After growing both for several years, I have to say that they are identical as far as I can tell.

I have an educated guess and a strong gut-level feeling about Littleton’s origins. Maine, New Hampshire and Vermont was Abenaki territory. West of Lake Champlain was Mohawk territory. The Abenaki engaged in trade with the Mohawks, so I think it is reasonable to assume that Abenakis were growing this bean and calling it Mohawk in some cases. The area around Littleton NH was in the heart of the territory of the Cowas Abenakis, my ancestors. I cannot prove the connection between the Cowas and this bean, but I feel it.

Unfortunately, my grandparents’ generation was pretty phobic about anything that might be perceived as indian-ness. At the time they were starting a family racial prejudice reached a real crescendo with Vermont’s eugenics program. So, there was a major erasure of culture, and I can only piece random fragments together and guess…